

Making a Pottery Table Lamp
Each time I go into pottery class, I give myself a challenge for those 3 hours. My own personal “Pottery Throwdown” – making a pottery table lamp!
To fit the space, I knew that it had to be medium size. Additionally, the lamp would have longevity if it was glazed white to go with any décor changes in the future. Then, it can be easily updated by just buying a new lampshade. I also wanted the base to be fairly heavy and sturdy so there would be no danger of it falling.
Planning and Measurement
I started by quickly drawing some forms that I had in mind for my lamp. From watching The Great Pottery Throwdown, I knew that I had to be diligent about my measurements and factor in shrinkage in the kiln. The plan was that my lamp would have the height, width, and diameter of 7 inches. My neck opening for the socket was to be about 2 inches and I could bet on 15% shrinkage after glaze fire.
For symmetry, I was planning for a lampshade of 7 inches. Finally, I looked up the availability of lamp wiring kits and found that they are common at hardware stores or Amazon.
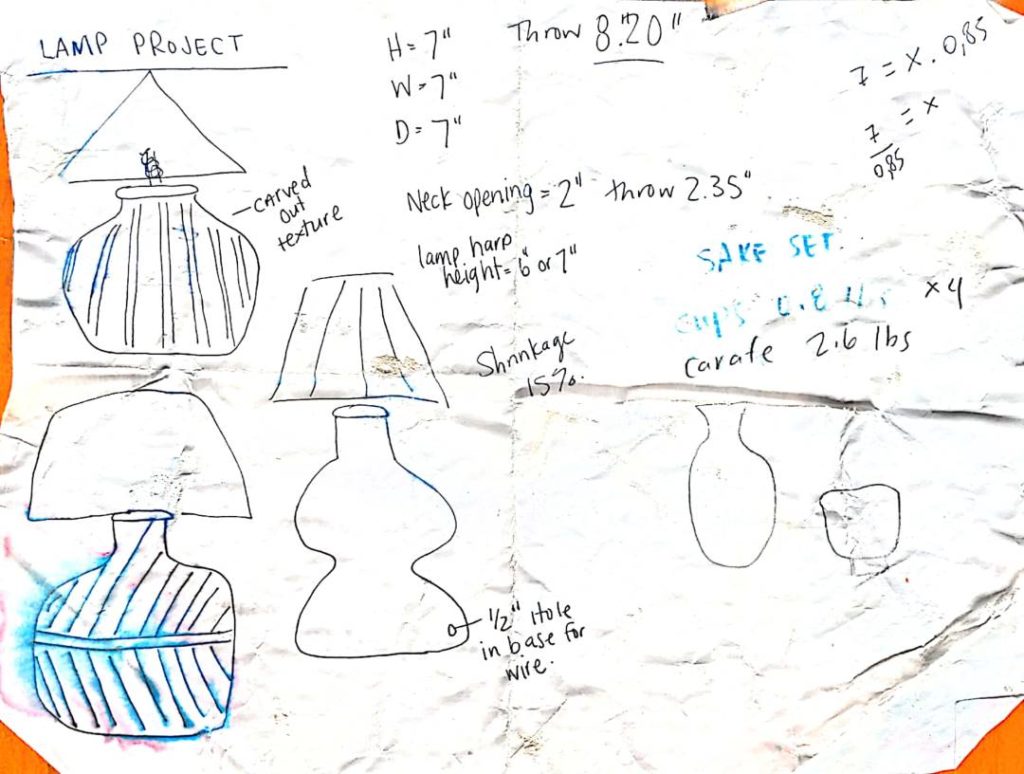
Throwing the Lamp
I got to class, set up my wheel, and measured out 4 pounds of clay. As I’m not a very strong thrower yet, 4 pounds was quite a challenge to keep under control. By accident, I managed to get an interesting base shape. My instructor encouraged me to keep going and try to pull the clay as high as I could go. That turned out to be about 7 inches but I knew with shrinkage that I needed to get it up to 8.2 inches. There is a spot where the clay collapsed in itself a bit, but I decided to go with it as part of my handmade, unfiltered aesthetic.
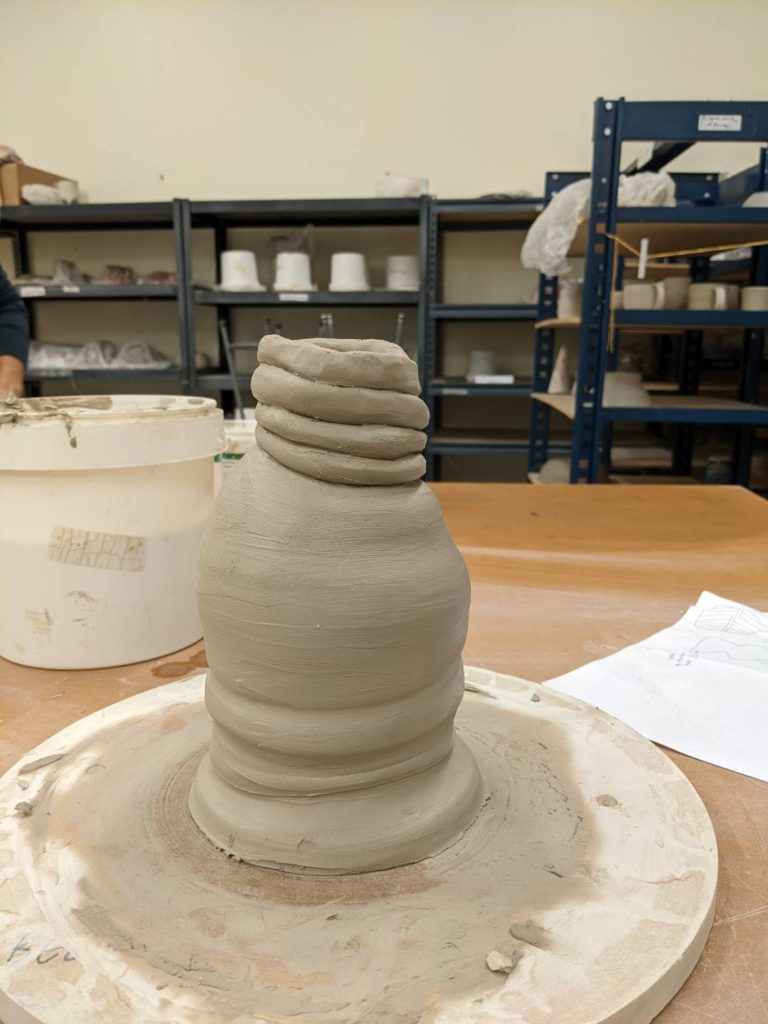

With some consultation from my instructor, we decided that I should use coils to create the neck of my lamp and then I could control the size of the opening better.
The Lamp Socket Opening
This felt like the trickiest part and I gave it my full attention. In my research before class, I learned that 2 inches would be a good size. Looking back on this now, I see there are ways around this with wiring (see video under Wiring the Lamp). I made sure the shape was round so the socket could properly fit.
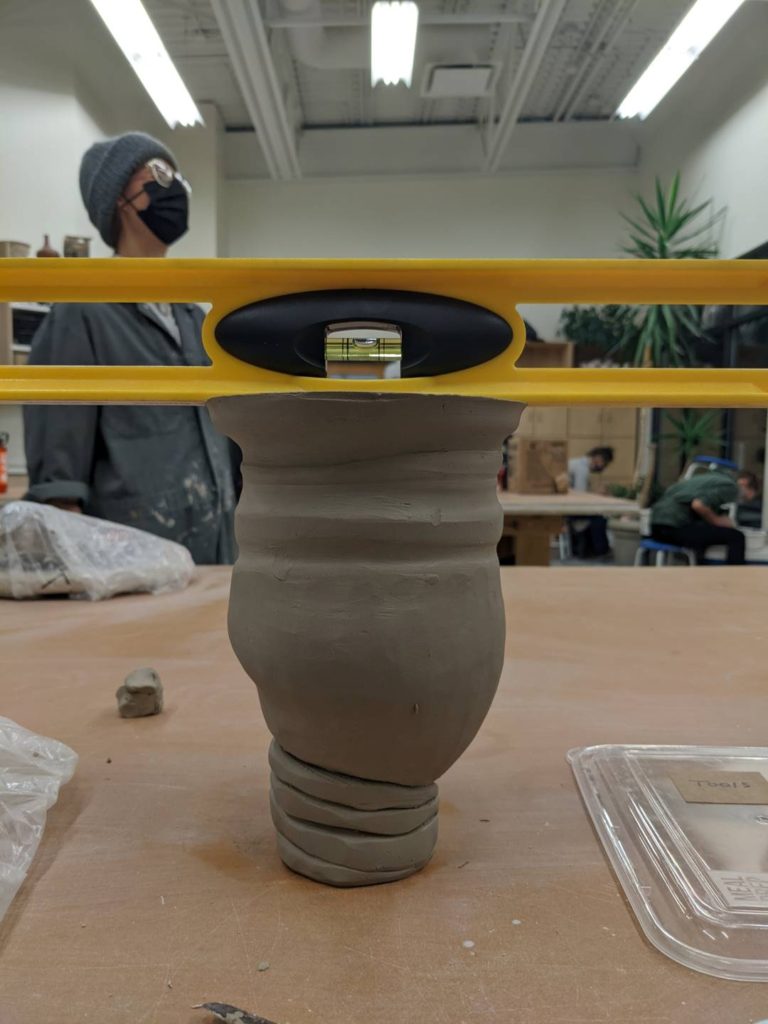
One week later, once it was leather-hard, I removed extra clay and made sure it was level on the top and the bottom for sturdiness. My form is a closed bottom so after it was leather-hard, I used a hole cutter tool in 5/16 of an inch for my cord hole.
Decoration and Texture
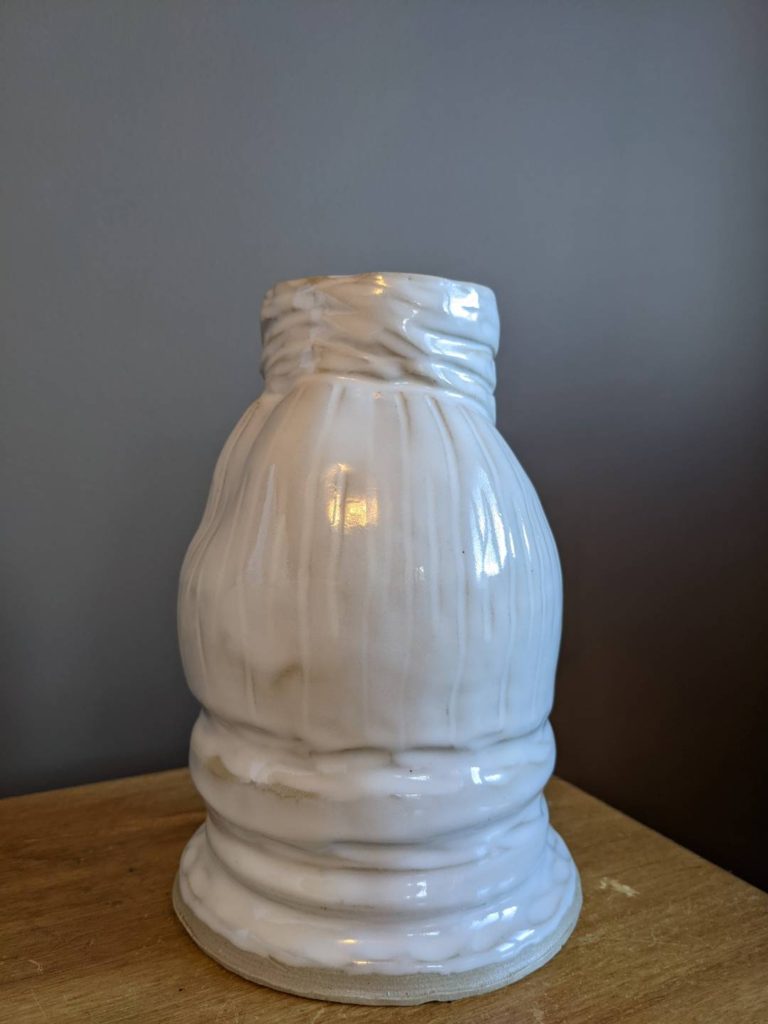
When it came time for carving and decoration, my favourite part, I already had an nature vibe in mind. I was thinking about a rock in a creek and how it is smoothed by water over time. So, I started by smoothing the clay with a roller tool. After I finished rolling I felt like the lamp base needed some more visual interest. Then, I decided to carve in choppy ripple shapes on the bottom and the top. In the middle I carved vertical lines to draw the eye up and down.
Glazing the Pottery Lamp
My main vibe goal was to keep it simple so the base would POP against my “grizzly bear brown” walls in my bedroom. Incidentally, the rocks in the creek by my home have a white hue due to the minerals in the water in Canmore. In order to highlight the texture, my instructor mentioned that lightly washing your pots before glazing can result in a thinner glaze. I tried it and it worked out great.
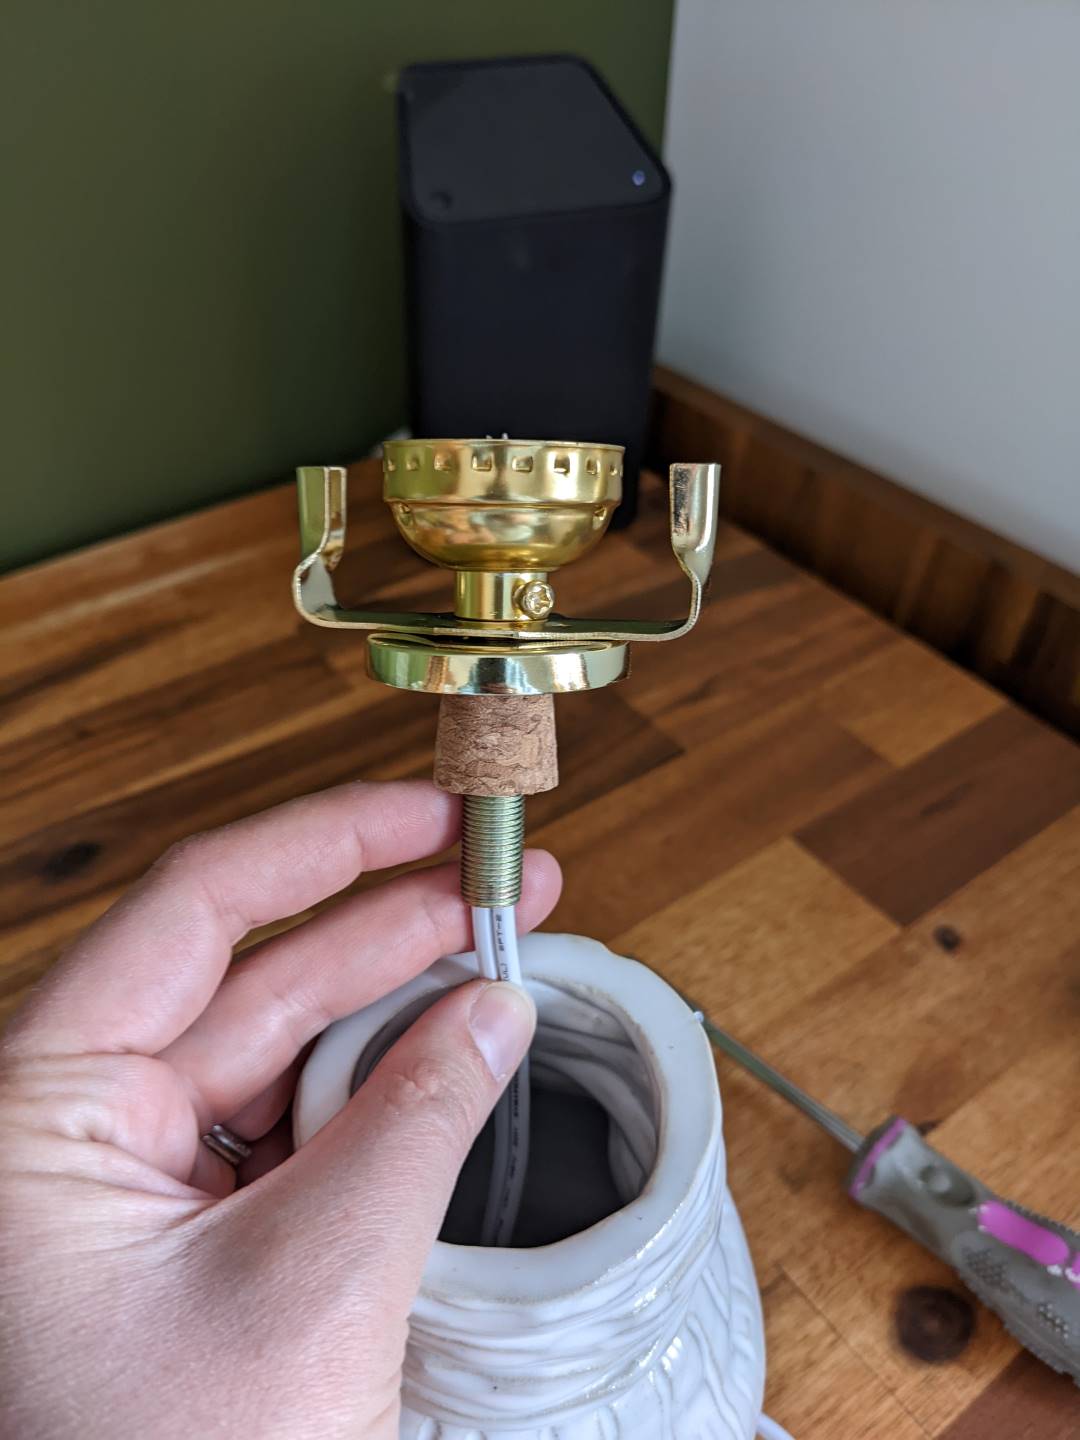
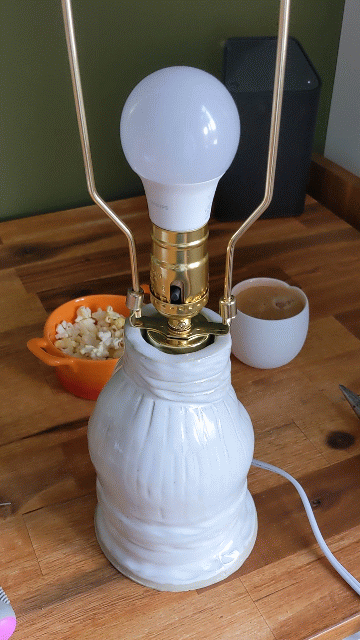
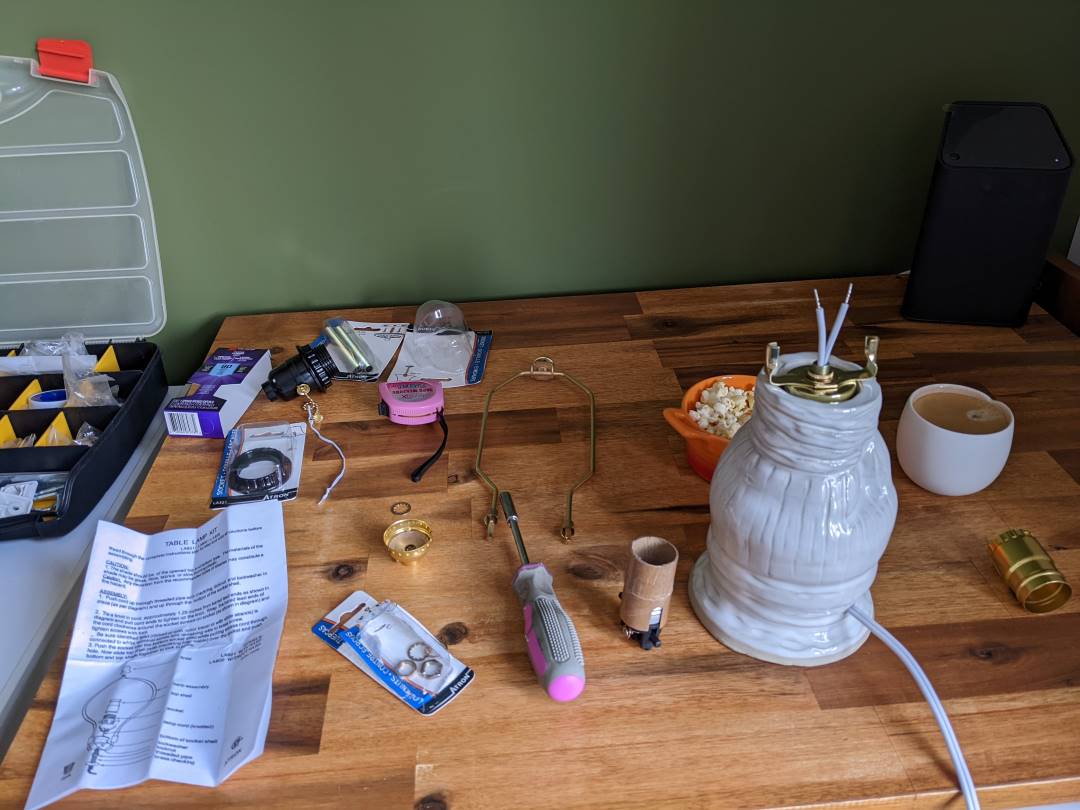
Wiring the Pottery Lamp
I had my eyes on a lamp wiring kit and figured this was going to be pretty easy. Once I was at the wiring stage, my partner encouraged me to do a little more research and I’m glad I did. I found this fantastic YouTube tutorial that went over the wiring really well and opened my eyes to other approaches for next time.
So, I went to Canadian Tire, found the bits I needed and got to it! It was fairly simple and with the help of this YouTube video, I felt pretty confident.
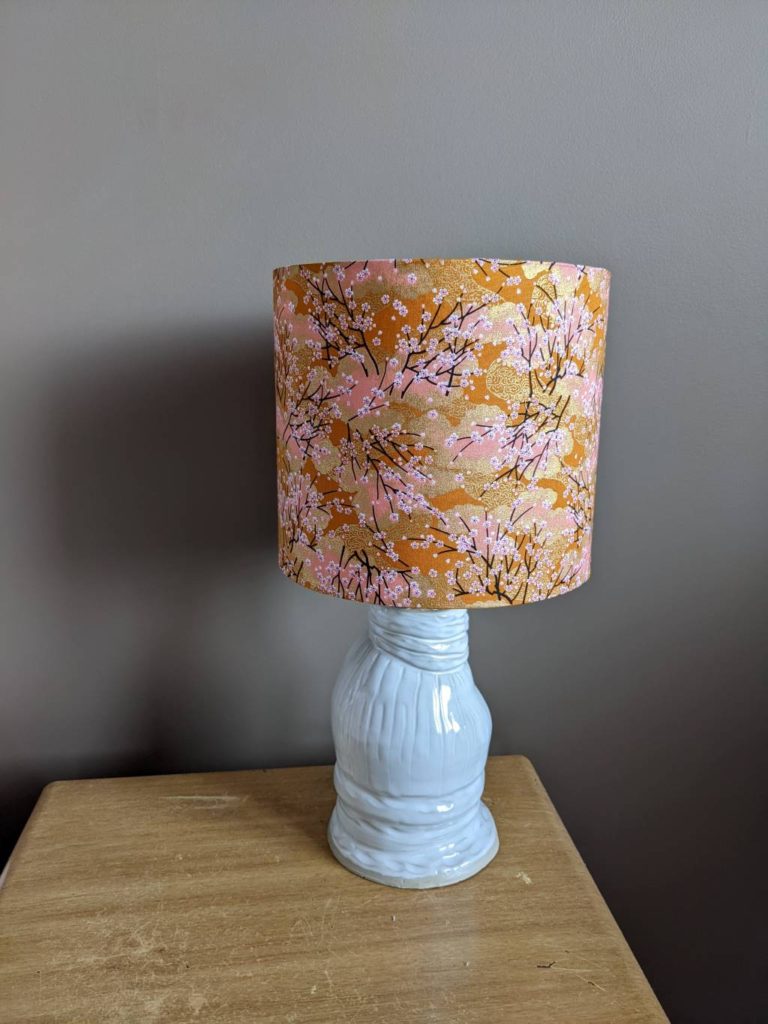
Choosing a Lampshade
In choosing a pattern lampshade, I knew I wanted a calming vibe and a fabric that would cast a warm, cozy light for reading. It took a couple of weeks of cruising Etsy to find what I was looking for. Eventually, the Etsy algorithm tune in to what I was searching for and made discovering different lampshade makers easier. Turns out the United Kingdom has a lot of lampshade makers!
The shade I choose continues the Japanese inspiration that I’ve had all Spring. When it arrived I found that it was the perfect size. However, the 7 inch shade didn’t work with my 8 inch harp that came in my lamp kit. I ended up ordering an additional 7 inch lamp harp and that fixed it.

On the whole, I’m so happy with this project and I will be making more pottery lamps in the future.
One response to “Making a Pottery Table Lamp”
Leave a Reply
About Me

Recent Posts
- 2025 Reading Recap: Preparing for Change January 4, 2026
- My Best Books of 2024 and Leaving GoodReads January 3, 2025
- Creating PLAYFUL BEINGS Tarot Deck – a peek behind the scenes February 29, 2024
- Intaglio Printmaking – A Great Medium for Nature Art February 6, 2024
This is so fun! Great pairing of the shade with the base. Looks great both on and off :-) Thanks also for including photos of the socket setup. Always wondered how that works!